Saturday, December 11, 2010

Homemade almond butter

In my slow, but steady, journey to a more natural diet, I began making almond butter a few months ago.

I was often reading of the benefits of this wonderful alternative to peanut butter. The Doctors, Jillian Michaels, and Denise Austin said I should switch from peanut butter to almond butter so I jumped in the car and headed to the grocery store. When I saw the price, I immediately had a heart attack and fell to the floor faster than Alan can fall asleep in the recliner. When the paramedics came, they recommended that I learn to make my own almond butter. After all, what good are the health benefits if I have a coronary every time I purchase a jar? Made perfect sense to me.

Before I share my recipe, here's what I have learned about almond butter:

It is a food paste made from almonds (duh). Almonds are high in monounsaturated fats, which are considered to be a healthier form of fat than saturated fat. Like other nut butters, almond butter retains the nutritional value of the almonds it comes from. It is rich in protein, calcium, iron, essential fatty acids, Vitamin E, magnesium, and it is a great source of fiber. Unfortunately, it is also higher in calories than many other nut butters, but to me, the heart-health benefits outweigh the extra calories.

The uses for almond butter are as varied as they are for peanut butter. It can be used like a spread, mixed into sauces and dressings, eaten plain, or used in desserts. The flavor is actually quite similar to peanut butter, with a faint hint of almonds.

There are a number of different styles of almond butter, starting with toasted or raw. Toasted almond butter has a richer flavor, but some people prefer the milder taste of raw almond butter. The smoothest and creamiest is made from almonds that have been blanched to remove their skins, and then finely ground. More chunky versions include almond skin, and are not ground as finely.

My version is made with toasted almonds, including the skin. I have made both toasted and raw, and personally prefer toasted.

You'll need a heavy-duty food processor (not the small, mini version) plus these ingredients:


2 cups toasted almonds (I toast in the toaster oven on 350 degrees for six minutes)
1/2 teaspoon salt (or to taste)
2 tablespoons olive oil (or to taste)
2 tablespoons brown sugar (or to taste)

Add the toasted almonds to the food processor and process until the nuts are finely chopped and begin to turn creamy (1-2 minutes). Add the salt, olive oil, and brown sugar and process until the following consistency:


That's it! Seriously!

Store the almond butter in your pantry or refrigerator. Just remember, there are no preservatives, so choose your storage method with that in mind. I have successfully pantry-stored almond butter for over a week with no problem.

I love almond butter on vanilla wafers! What's not to love?
Enjoy!

Thursday, December 2, 2010

Out of the dark

In my continued series, Darkness into Life: Alabama's Holocaust Survivors Through Photography and Art, meet Riva Hirch and read her compelling story:

When little girls are ten years old, they should be playing with dolls or hosting tea parties.

When Riva Hirsch was ten years old, she was hidden by nuns in a bunker near a convent in Ukraine. Fearful of frequent visits by the SS soldiers, the nuns were only able to visit the bunker every two or three days to leave food and water.
Out of the Dark by Becky Seitel
“When the door was cracked, it was my lifeline. The door separated me from the outside world. Inside that bunker, my life was lonely and frightening,” she recalls.

So fearful were the nuns of being discovered, they often simply cracked the door and hurriedly threw in the food.

“I was living among rats. If I was fast enough to get to the food before the rats ran away with it, I ate. If I was too slow, I was forced to exist on lice. They were all over me. At times, I could hardly open my eyes or my mouth. Swallowing lice helped keep me alive. They were my breakfast, lunch, and dinner.”

Riva existed in this dark isolation for two years.

“I don’t know how time passed. Day was night and night was day. I felt more dead than alive. But even though I didn’t have even the simple basics of life like other little girls, I was safe.”

“In 1945, the door of the bunker opened wide. It had not been open more than a crack for two years.

“The nuns wrapped my frost-bitten feet in cloth and draped a blanket over my shoulders. I was suffering from malaria and typhus. My vision was impaired and my teeth had fallen out.

“A voice spoke in a language I didn’t understand. I later learned the Russian Army had liberated me.

“A hand pushed me forward. I moved toward the light, and with small footsteps, left the bunker in Tulchin, Ukraine.

“I was 12 years old.”

Like many children of the Holocaust, Riva was robbed of her childhood more than six decades ago by Adolph Hitler.

Today, she spends time working with the Elks Lodge of Mountain Brook to help promote the education and social development of Alabama’s youth.

Riva is well-known throughout the state for her dedication to raising money for the Elks Youth Camp. Located on Lake Martin in Tallassee, Alabama, the Elks Youth Camp offers activities and programs for young people between ages eight and thirteen. The youngsters receive an opportunity to experience different surroundings while learning valuable lessons about life. The programs are designed to help build character while showing how important it is to work with others.
Building Better Kids by Becky Seitel
In 2006, Riva single-handedly sold more Cadillac raffle tickets than any other Alabama member. This was just one of the reasons she was named Alabama Elk of the Year, becoming the first woman to receive that honor in the history of the Mountain Brook Lodge.

“Since we came to America in 1962, people have been wonderful to my husband and me,” Riva says. “Being a part of the Elks Association gives me an opportunity to give something back to this country by giving our youth such a great opportunity to build character… and have fun!”

Riva's husband, Aisic, is also a Holocaust survivor.

When she talks about the terror she experienced in Ukraine, he understands more than anyone. That’s because he experienced circumstances very similar to Riva’s, almost 1,000 miles away in Poland.

Riva and Aisic Hirsch married in Haifa in 1950, five years after they were liberated by Russian troops.

“We both went to Palestine after the war, and it was there that I met my beshert, a Yiddish word that means perfect match, soul mate, destiny,” Riva explains.
Beshert by Becky Seitel
“I was a police officer and often ate at a local café. Riva was a waitress there, just 16, and the most beautiful girl I had ever seen,” says Aisic.

Through the years, they’ve shared much more than the painful story of their past. They’ve shared many happy family times, always observing and celebrating their Jewish faith and heritage, a faith and heritage that made them a target of murder by the Nazis and then brought them together in Palestine.
Friday Night by Becky Seitel

Saturday, November 27, 2010

Daring Bakers' Challenge: Crostata

Last week, I blogged about joining The Daring Kitchen, an-online community of cooks and bakers who are challenged each month to cook or bake something new and different. Everyone uses the same recipe and then posts their results, with narrative and photographs, on their blog.

The 2010 November Daring Bakers’ challenge was hosted by Simona of briciole. She chose to challenge Daring Bakers to make pasta frolla for a crostata. She used her own experience as a source, as well as information from Pellegrino Artusi’s Science in the Kitchen and the Art of Eating Well.
The mandatory challenge was to make pasta frolla using one of the two recipes provided and use it as the base layer for a crostata. The crostata could be made with fruit preserves or pastry cream or any other filling of my choice. The pasta frolla could be made with or without a food processor. I chose to go it sans food processor simply for the experience.

Equipment required:
  • bowls, as needed
  • fork
  • knife
  • bench (or pastry) scraper
  • rolling pin
  • pastry brush
  • 9 or 9.5-inch fluted round tart pan with removable bottom, about 1 inch high. I didn't have a tart pan, but had been wanting one. I was able to pick one up for a mere $5.00 so I was pretty happy.
9.5-inch fluted round tart pan with removable bottom

    • (Note: If you don't have a tart pan with a removable bottom, you can make crostata using a 9-inch cake pan or even a 9-inch pie plate.
    • a food process is useful, but not required
    I chose Version 1 of the pasta frolla.

    Ingredients:
    • 1/2 cup minus 1 tablespoon superfine sugar or a scant 3/4 cup of powdered sugar
    • 1 and 3/4 cup unbleached all-purpose flour
    • a pinch of salt
    • 1 stick cold unsalted butter, cut into small pieces
    • grated zest of half a lemon
    • 1 large egg and 1 large egg yolk, lightly beaten in a small bowl

    pasta frolla ingredients
    1. Whisk together sugar, flours, and salt in a bowl.
    2. Rub or cut the butter into the sugar and flour mixture until it has the consistency of coarse crumbs. You can do this in the bowl or on your work surface, using your fingertips or an implement of choice.
    3. Make a well in the center of the flour and butter mixture and pour the beaten egg and vanilla extract into it.
    4. Use a fork to incorporate the liquid into mixture and then use your fingertips.
    5. Knead lightly just until the dough comes together into a ball.
    6. Shape the dough into a flat disk and wrap in plastic wrap. Place the dough in the refrigerator and chill for at least two hours. You can refrigerate the dough overnight.
    dough well

    dough disk
    Assembling the crostata
    1. Heat the oven to 375º F.
    2. Take the pasta frolla out of the fridge, unwrap it and cut away ¼ of the dough. Reserve this dough to make the lattice top of the crostata. Refrigerate this dough while you work on the tart base.
    3. To help roll the crostata dough, keep the dough on top of the plastic wrap in which it was wrapped. This can help rolling the dough and can also help when transferring the dough to your pan. You can also use parchment paper for this; however you can also roll the dough directly on a work surface if you prefer.
    4. Lightly dust the top of the dough and your work surface (if you’re rolling directly on a work surface) with flour. Keep flour handy to dust the dough as you go along.
    5. If the dough is very firm, start by pressing the dough with the rolling pin from the middle to each end, moving the rolling pin by a pin's width each time; turn the dough 180 degrees and repeat; when it softens, start rolling.
    6. Roll the dough into a circle about 1/8th inch thick.
    7. If you used the plastic wrap or parchment paper as rolling surface, flip dough over the pan, centering it, and delicately press it all around so the corners are well covered. Peel away the plastic wrap.
    8. Trim the excess dough hanging over the edges of the pan. Press the remaining dough around the border into the sides of the pan making sure the border is an even thickness all the way around.
    9. Prick the bottom of the dough with a fork in several places.
    10. Take out of the fridge the reserved pasta frolla you had cut away earlier. Roll it with your pin and cut into strips or use cookie cutters to make small shapes (this is not traditional, but it looks cute); or roll with your hands into ropes.
    11. Spread the jam or fruit preserves evenly over the bottom of the crostata.
    12. Use the prepared strips or rolls of dough to make a lattice over the surface, or decorate with the cut shapes.
    13. Brush the border and strips of dough with the reserved beaten eggs. You can add a drop or two of water to the beaten eggs if you don’t have enough liquid.
    14. Put the tart in the oven and bake for 25 minutes.
    15. After 25 minutes, check the tart and continue baking until the tart is of a nice golden hue. (Note: Every oven is different. In my oven it took 34 minutes to bake the tart until golden.)
    16. When done, remove the tart from the oven and let cool. If you have used a tart pan with a removable bottom, then release the tart base from the fluted tart ring. Make sure the tart is completely cool before slicing and serving.
    my crostata
    The fresh-out-of-the-oven-crostata didn't last long. I shared with my niece and my husband, both who loved it, and my neighbor who said, "I am so glad I made the acquaintance of a crostata tonight!"

    I will definitely make this again, but will opt for the food processor version of the pasta frolla.

    I look forward to the next Daring Bakers' Challenge.

    Friday, November 26, 2010

    My Thanksgiving List

    Yes, I know I'm a smidgen late, but this week went by in a chaotic whirlwind of house cleaning, planning, cooking, Christmas shopping, and an-over-the-river-and-through-the-woods drive to visit Kittie and family.

    Of course, it can almost go without saying that I'm thankful for my family, friends, neighbors, soldiers who keep us free, and Alabama football. These are the sources of my daily happiness. Without them....well, I don't even want to think about that.

    But let's admit, there are many things we don't always remember to be thankful for. And, yes, I know I ended a sentence with a preposition. (Remember that outstanding line from Designing Women when the snobby socialite told Julia, "Don't you know you don't end a sentence with a preposition?" Julia's retort was beyond perfect and not really printable here.

    So here (in no particular order) is my top five list of not so common things for which I am immensely thankful:

    1. I don't have to shave my legs as often as I used to. When I was younger, leg shaving was a daily ritual. Then the need decreased to every other day. Now, the mid-50s have given me a three-day respite from the blade whose life has been extended, thereby saving me a little money. Thankful, thankful, thankful.

    2. Snooze alarm. I never, never, ever jump out of bed to greet the day on the first unwanted jolt from the alarm clock. The snooze alarm feature not only allows me to wake up slowly, but it let's me kinda thumb my nose at the clock and say, "Hey, you! I'll get up when I'm good and ready. You can't make me do it! Give me seven more minutes." That feels so good.

    3. Under eye concealer. Because I unequivocally trust Ellen Degeneres, I use Covergirl & Olay Simply Ageless #215. Without that tiny round container of flesh-colored magic, I would never be able to leave the house. Seriously. Ladies, have you ever thought you had leftover, smudged mascara on your under-eye area? So you grab a tissue, a little lotion or eye makeup remover, and clean the tender area only to find the tissue is clean and the smudge didn't go away? I have...several times. That's when I knew I had to depend on under eye concealer. Thankful? Yes. Everyday.

    4. Hormone replacement therapy. Not having to shave my legs as often is no where near balanced by menopause. Those years (oh yes, years) have been the most miserable of my life. Hot flashes are from Satan. Or Eve. I'm certain it dates back to that foolish day with the apple and the snake. It is impossible to cool off from a hot flash. I have chugged ice water, stood in the open freezer door, turned the air conditioner to 50 degrees, and slept with the windows open in the winter. Nothing helped until my doctor prescribed  "the patch." Life became somewhat normal again. Of course, any chance of becoming a pole dancer immediately vanished, even thought the patch was clear and small. Still the audience conversation would go something like, "What's that on her tummy?" Someone would answer, "What? I don't see anything?" Another, "Yeah, right there. That little clear thing." But pole dancing was never a life mission for me, so I'm good with the patch.

    5. Control top pantyhose. I haven't worn hose in maybe three years. I personally have a love / hate relationship with them. When I was experiencing #4 above, I decided pantyhose were also from Satan. Instead of bra burnings, we should have burned hose. That said, they are a true friend when those slacks are just a tad snug or you have a few little ripples of cellulite showing through that new slinky, black dress. I'm happy they're there when I need them and tucked away in the back of a drawer when I don't.

    That's my list. Now, what are some of your less typical objects of thanks? I really need to know that I'm not the only quirky one out there.

    Sunday, November 21, 2010

    Onesie Gift Idea

    It's that time of year and, unlike some people, you hate to go to the mall.

    What to do?

    On-line shop, of course.

    If you have a tiny loved one, or will soon, I have a beautiful selection of hand-decorated onesies!

    Take a look:

    Satin hearts on white, 3 - 6 months, $10.00 plus shipping
    Future Diva on pink, 6 - 9  months, $12.00 plus shipping

    My Mommy Loves Me on white, 6 - 9 months, $10.00 plus shipping

    Owl on brown stripes, 6 - 9 months, $12.00 plus shipping

    Lollipop on purple stripes, 12 months, $12.00 plus shipping
    These adorable onesies are 100% organic cotton and are machine washable.

    To order, please send an email to bseitel@bellsouth.net.

    Happy holidays!

    Also a great baby shower gift!

    Friday, November 19, 2010

    Quick and easy gift idea

    If you're looking for an idea for hand-made Christmas gifts, here is one of my favorite quick, easy, and unique presents! Plus it's tons of fun to make with kids of all ages and is sure to elicit a smile for years to come.

    Photograph with added flowers and ribbon.
    I actually saw this idea in a photography magazine years and years ago and stored it in my feeble brain until Kynze asked me to help her make a Mother's Day gift for her Mom. So one sunny Saturday, she donned a dress, strapped on her angel wings, and outside we went.

    Of course, she wanted to play more than pose!

    Boogie Angel!
    As you can see, the angel forgot her petticoat!
    Begin by staging the pose with one hand held out in a fist. Make certain the hand is low enough so that the flowers do not cover the face in the finished photograph.

    Fist too high.
    Better placement of fist.
    After the photograph is printed, place a small slit or hole at the top and bottom of the fist. Insert the flower stem into the top of the fist, through the back of the photo, and then out the bottom of the fist. Add ribbon. You can also wrap the flower stems, if desired.

    Remove the glass from the picture frame and insert the photograph.

    Viola!

    Smile and give yourself a pat on the back! You're about to be loved even more by the recipient of this wonderful keepsake!

    Note: this idea is also neat with two or more children. Either stack their fists or place hand around hand. 

    Monday, November 15, 2010

    My first Daring Cooks' Challenge: spinach soufflé

    A few months ago, a friend of Alan's suggested I join The Daring Kitchen, an-online community of cooks and bakers who are challenged each month to cook or bake something new and different. Everyone uses the same recipe and then posts their results, with narrative and photographs, on their blog. Sounded like fun to me, so here I am...posting the results of my first challenge: a spinach soufflé.

    Dave and Linda from Monkeyshines in the Kitchen chose soufflés as our November 2010 Daring Cooks' Challenge! Dave and Linda provided two of their own delicious recipes plus a sinfully decadent chocolate soufflé recipe adapted from Gordon Ramsay's recipe found at the BBD Good Food website. 

    Of the three recipes, I chose the watercress / spinach soufflé, a little afraid to invest in the ingredients for the crab and artichoke soufflé or the chocolate soufflé.

    A great thing about the challenge is that you're not required to buy new dishes, pans, etc. An alternative is always given. In this case, I could use any 2-quart baking dish that had tall, relatively straight sides. But I thought this would be a great time to purchase a soufflé dish since one was not in my limited kitchen arsenal. 

    First stop was Wal-mart where a round soufflé dish costs around $22. No way! But, ah, an oval soufflé dish goes for $9. Go figure. So I purchased the oval dish, feeling proud that I had beaten the system. Imagine my disappointment when I began to re-read the recipe and discovered that the 2 1/2 quart oval dish was too large. Back to Wal-mart, return the oval soufflé dish, go to Target, prices and options the same, on to Tuesday Morning, T J Maxx, and a few other stores. No luck.

    The idea of emailing my neighbors came next. Most replies were simply "No," except for my exceptionally comical neighbor who responded, "Do I look like the kind of girl who would own a soufflé dish"? I'm still chuckling about that.

    Alan suggested going to Old Time Pottery, which I thought was a wasted trip, but you'll never guess what I found there: a round 2-quart soufflé dish for $2. Yes $2. So I bought two! Don't tell me you wouldn't have. You know you would. 

    My set-aside day for the challenge arrived and I have to admit I was nervous. I read and re-read the recipe upteen times and learned, among other things, that soufflé is French for puff up or blow up. I learned about making the roux, adding ingredients and whisking egg yolks over simmering water, preparing them, but not cooking them, for the cooked mixture. I was also told that perhaps the most difficult aspect of the challenge would be to photograph the finished soufflé since what goes up must come down. I was warned to work quickly.

    The instructions also suggested that I prepare all ingredients prior to starting the cooking process. 

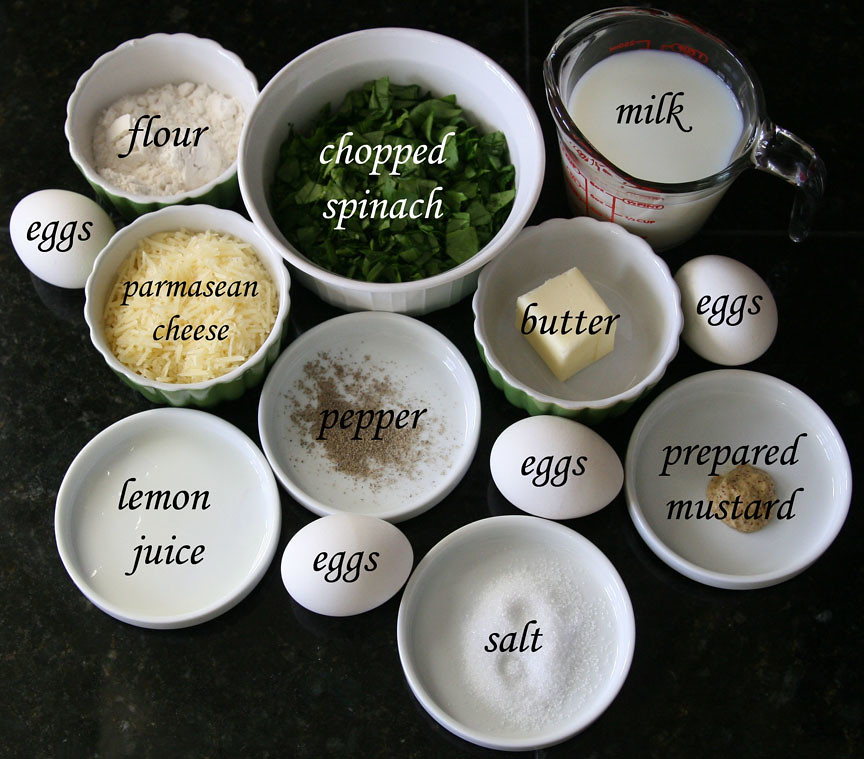
    Here's how my work area looked:


    2 tablespoons butter, plus additional for the soufflé dish
    3 1/2 tablespoons all purpose flour
    1 cup milk
    1/2 cup parmesan cheese, finely grated, plus additional for the soufflé dish
    1 cup finely chopped de-stemmed watercress (can substitute spinach) - this measure is the leaves after they’ve been washed, de-stemmed, and chopped
    4 large eggs, separated
    1/2 teaspoon prepared mustard
    1/4 teaspoon cream of tartar (a dash {~ 1/2 teaspoon} of lemon juice can be substituted)
    Salt and pepper to taste

    Directions:

    Butter the soufflé dish thoroughly, then grate a small amount of cheese in each dish and tap so that the sides are evenly coated with the cheese. Place the dish in the refrigerator until needed. This helps the soufflé climb.

    Preheat oven to 350º F.

    Wash and chop the watercress / spinach.

    Finely grate the parmesan cheese.

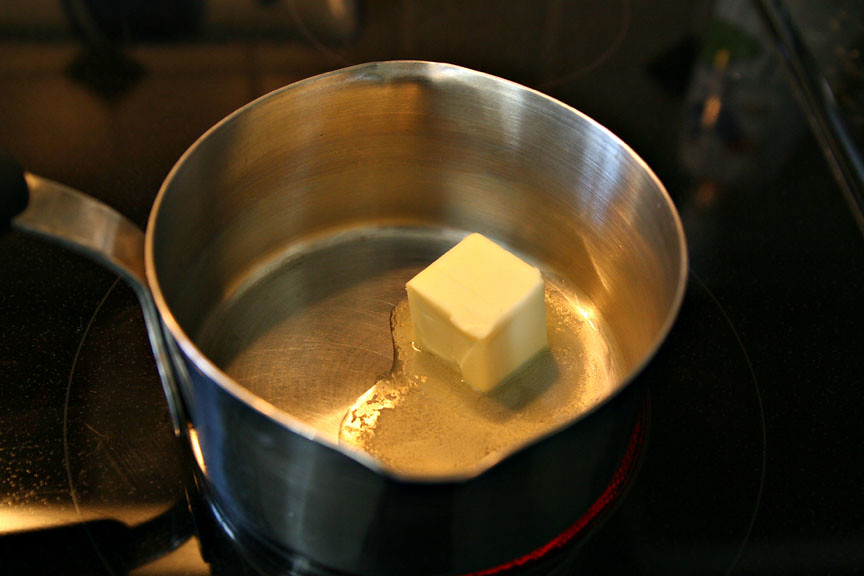
    In a medium-size saucepan, melt the butter over medium heat.


    Stir in the flour to make a roux. Cook 1 minute, then add the milk, a little at a time, and stir until just thickened, about 1 minute. Add the cheese and stir until it’s just melted. Remove from heat then add the watercress / spinach and salt and pepper.


    In a larger pan, bring water to a gentle simmer. (I used a double-boiler with a small amount of water in the bottom pot. I did not allow the water to touch the upper pot.) Whisk the egg yolks in a bowl set just over this water until pale and slightly foamy – about six minutes. Do not allow the eggs to cook.


    Mix the egg yolks into the watercress sauce.

    Beat the egg whites and cream of tartar until they form stiff peaks yet are still glossy.

    Fold the egg whites into the sauce in three additions so that it’s evenly mixed, but too much volume isn't lost.

    Remove the soufflé dish from the refrigerator and spoon the mix into it. Use a spatula to even the top and wipe off any spills.


    Bake 40 minutes, then serve immediately.


    At the end of 40 minutes, I was literally giddy with excitement. The soufflé had risen and looked and smelled divine.

    I shared some of the just-out-of-the-oven dish with a friend who commented that it was not only delicious but beautiful. That night, Alan said that every bite was fabulous and he was already looking forward to leftovers the following night.

    I will definitely make soufflés in the future, a lot less nervous and a lot more daring!