Saturday, November 27, 2010

Daring Bakers' Challenge: Crostata

Last week, I blogged about joining The Daring Kitchen, an-online community of cooks and bakers who are challenged each month to cook or bake something new and different. Everyone uses the same recipe and then posts their results, with narrative and photographs, on their blog.

The 2010 November Daring Bakers’ challenge was hosted by Simona of briciole. She chose to challenge Daring Bakers to make pasta frolla for a crostata. She used her own experience as a source, as well as information from Pellegrino Artusi’s Science in the Kitchen and the Art of Eating Well.
The mandatory challenge was to make pasta frolla using one of the two recipes provided and use it as the base layer for a crostata. The crostata could be made with fruit preserves or pastry cream or any other filling of my choice. The pasta frolla could be made with or without a food processor. I chose to go it sans food processor simply for the experience.

Equipment required:
  • bowls, as needed
  • fork
  • knife
  • bench (or pastry) scraper
  • rolling pin
  • pastry brush
  • 9 or 9.5-inch fluted round tart pan with removable bottom, about 1 inch high. I didn't have a tart pan, but had been wanting one. I was able to pick one up for a mere $5.00 so I was pretty happy.
9.5-inch fluted round tart pan with removable bottom

    • (Note: If you don't have a tart pan with a removable bottom, you can make crostata using a 9-inch cake pan or even a 9-inch pie plate.
    • a food process is useful, but not required
    I chose Version 1 of the pasta frolla.

    Ingredients:
    • 1/2 cup minus 1 tablespoon superfine sugar or a scant 3/4 cup of powdered sugar
    • 1 and 3/4 cup unbleached all-purpose flour
    • a pinch of salt
    • 1 stick cold unsalted butter, cut into small pieces
    • grated zest of half a lemon
    • 1 large egg and 1 large egg yolk, lightly beaten in a small bowl

    pasta frolla ingredients
    1. Whisk together sugar, flours, and salt in a bowl.
    2. Rub or cut the butter into the sugar and flour mixture until it has the consistency of coarse crumbs. You can do this in the bowl or on your work surface, using your fingertips or an implement of choice.
    3. Make a well in the center of the flour and butter mixture and pour the beaten egg and vanilla extract into it.
    4. Use a fork to incorporate the liquid into mixture and then use your fingertips.
    5. Knead lightly just until the dough comes together into a ball.
    6. Shape the dough into a flat disk and wrap in plastic wrap. Place the dough in the refrigerator and chill for at least two hours. You can refrigerate the dough overnight.
    dough well

    dough disk
    Assembling the crostata
    1. Heat the oven to 375º F.
    2. Take the pasta frolla out of the fridge, unwrap it and cut away ¼ of the dough. Reserve this dough to make the lattice top of the crostata. Refrigerate this dough while you work on the tart base.
    3. To help roll the crostata dough, keep the dough on top of the plastic wrap in which it was wrapped. This can help rolling the dough and can also help when transferring the dough to your pan. You can also use parchment paper for this; however you can also roll the dough directly on a work surface if you prefer.
    4. Lightly dust the top of the dough and your work surface (if you’re rolling directly on a work surface) with flour. Keep flour handy to dust the dough as you go along.
    5. If the dough is very firm, start by pressing the dough with the rolling pin from the middle to each end, moving the rolling pin by a pin's width each time; turn the dough 180 degrees and repeat; when it softens, start rolling.
    6. Roll the dough into a circle about 1/8th inch thick.
    7. If you used the plastic wrap or parchment paper as rolling surface, flip dough over the pan, centering it, and delicately press it all around so the corners are well covered. Peel away the plastic wrap.
    8. Trim the excess dough hanging over the edges of the pan. Press the remaining dough around the border into the sides of the pan making sure the border is an even thickness all the way around.
    9. Prick the bottom of the dough with a fork in several places.
    10. Take out of the fridge the reserved pasta frolla you had cut away earlier. Roll it with your pin and cut into strips or use cookie cutters to make small shapes (this is not traditional, but it looks cute); or roll with your hands into ropes.
    11. Spread the jam or fruit preserves evenly over the bottom of the crostata.
    12. Use the prepared strips or rolls of dough to make a lattice over the surface, or decorate with the cut shapes.
    13. Brush the border and strips of dough with the reserved beaten eggs. You can add a drop or two of water to the beaten eggs if you don’t have enough liquid.
    14. Put the tart in the oven and bake for 25 minutes.
    15. After 25 minutes, check the tart and continue baking until the tart is of a nice golden hue. (Note: Every oven is different. In my oven it took 34 minutes to bake the tart until golden.)
    16. When done, remove the tart from the oven and let cool. If you have used a tart pan with a removable bottom, then release the tart base from the fluted tart ring. Make sure the tart is completely cool before slicing and serving.
    my crostata
    The fresh-out-of-the-oven-crostata didn't last long. I shared with my niece and my husband, both who loved it, and my neighbor who said, "I am so glad I made the acquaintance of a crostata tonight!"

    I will definitely make this again, but will opt for the food processor version of the pasta frolla.

    I look forward to the next Daring Bakers' Challenge.

    Friday, November 26, 2010

    My Thanksgiving List

    Yes, I know I'm a smidgen late, but this week went by in a chaotic whirlwind of house cleaning, planning, cooking, Christmas shopping, and an-over-the-river-and-through-the-woods drive to visit Kittie and family.

    Of course, it can almost go without saying that I'm thankful for my family, friends, neighbors, soldiers who keep us free, and Alabama football. These are the sources of my daily happiness. Without them....well, I don't even want to think about that.

    But let's admit, there are many things we don't always remember to be thankful for. And, yes, I know I ended a sentence with a preposition. (Remember that outstanding line from Designing Women when the snobby socialite told Julia, "Don't you know you don't end a sentence with a preposition?" Julia's retort was beyond perfect and not really printable here.

    So here (in no particular order) is my top five list of not so common things for which I am immensely thankful:

    1. I don't have to shave my legs as often as I used to. When I was younger, leg shaving was a daily ritual. Then the need decreased to every other day. Now, the mid-50s have given me a three-day respite from the blade whose life has been extended, thereby saving me a little money. Thankful, thankful, thankful.

    2. Snooze alarm. I never, never, ever jump out of bed to greet the day on the first unwanted jolt from the alarm clock. The snooze alarm feature not only allows me to wake up slowly, but it let's me kinda thumb my nose at the clock and say, "Hey, you! I'll get up when I'm good and ready. You can't make me do it! Give me seven more minutes." That feels so good.

    3. Under eye concealer. Because I unequivocally trust Ellen Degeneres, I use Covergirl & Olay Simply Ageless #215. Without that tiny round container of flesh-colored magic, I would never be able to leave the house. Seriously. Ladies, have you ever thought you had leftover, smudged mascara on your under-eye area? So you grab a tissue, a little lotion or eye makeup remover, and clean the tender area only to find the tissue is clean and the smudge didn't go away? I have...several times. That's when I knew I had to depend on under eye concealer. Thankful? Yes. Everyday.

    4. Hormone replacement therapy. Not having to shave my legs as often is no where near balanced by menopause. Those years (oh yes, years) have been the most miserable of my life. Hot flashes are from Satan. Or Eve. I'm certain it dates back to that foolish day with the apple and the snake. It is impossible to cool off from a hot flash. I have chugged ice water, stood in the open freezer door, turned the air conditioner to 50 degrees, and slept with the windows open in the winter. Nothing helped until my doctor prescribed  "the patch." Life became somewhat normal again. Of course, any chance of becoming a pole dancer immediately vanished, even thought the patch was clear and small. Still the audience conversation would go something like, "What's that on her tummy?" Someone would answer, "What? I don't see anything?" Another, "Yeah, right there. That little clear thing." But pole dancing was never a life mission for me, so I'm good with the patch.

    5. Control top pantyhose. I haven't worn hose in maybe three years. I personally have a love / hate relationship with them. When I was experiencing #4 above, I decided pantyhose were also from Satan. Instead of bra burnings, we should have burned hose. That said, they are a true friend when those slacks are just a tad snug or you have a few little ripples of cellulite showing through that new slinky, black dress. I'm happy they're there when I need them and tucked away in the back of a drawer when I don't.

    That's my list. Now, what are some of your less typical objects of thanks? I really need to know that I'm not the only quirky one out there.

    Sunday, November 21, 2010

    Onesie Gift Idea

    It's that time of year and, unlike some people, you hate to go to the mall.

    What to do?

    On-line shop, of course.

    If you have a tiny loved one, or will soon, I have a beautiful selection of hand-decorated onesies!

    Take a look:

    Satin hearts on white, 3 - 6 months, $10.00 plus shipping
    Future Diva on pink, 6 - 9  months, $12.00 plus shipping

    My Mommy Loves Me on white, 6 - 9 months, $10.00 plus shipping

    Owl on brown stripes, 6 - 9 months, $12.00 plus shipping

    Lollipop on purple stripes, 12 months, $12.00 plus shipping
    These adorable onesies are 100% organic cotton and are machine washable.

    To order, please send an email to bseitel@bellsouth.net.

    Happy holidays!

    Also a great baby shower gift!

    Friday, November 19, 2010

    Quick and easy gift idea

    If you're looking for an idea for hand-made Christmas gifts, here is one of my favorite quick, easy, and unique presents! Plus it's tons of fun to make with kids of all ages and is sure to elicit a smile for years to come.

    Photograph with added flowers and ribbon.
    I actually saw this idea in a photography magazine years and years ago and stored it in my feeble brain until Kynze asked me to help her make a Mother's Day gift for her Mom. So one sunny Saturday, she donned a dress, strapped on her angel wings, and outside we went.

    Of course, she wanted to play more than pose!

    Boogie Angel!
    As you can see, the angel forgot her petticoat!
    Begin by staging the pose with one hand held out in a fist. Make certain the hand is low enough so that the flowers do not cover the face in the finished photograph.

    Fist too high.
    Better placement of fist.
    After the photograph is printed, place a small slit or hole at the top and bottom of the fist. Insert the flower stem into the top of the fist, through the back of the photo, and then out the bottom of the fist. Add ribbon. You can also wrap the flower stems, if desired.

    Remove the glass from the picture frame and insert the photograph.

    Viola!

    Smile and give yourself a pat on the back! You're about to be loved even more by the recipient of this wonderful keepsake!

    Note: this idea is also neat with two or more children. Either stack their fists or place hand around hand. 

    Monday, November 15, 2010

    My first Daring Cooks' Challenge: spinach soufflé

    A few months ago, a friend of Alan's suggested I join The Daring Kitchen, an-online community of cooks and bakers who are challenged each month to cook or bake something new and different. Everyone uses the same recipe and then posts their results, with narrative and photographs, on their blog. Sounded like fun to me, so here I am...posting the results of my first challenge: a spinach soufflé.

    Dave and Linda from Monkeyshines in the Kitchen chose soufflés as our November 2010 Daring Cooks' Challenge! Dave and Linda provided two of their own delicious recipes plus a sinfully decadent chocolate soufflé recipe adapted from Gordon Ramsay's recipe found at the BBD Good Food website. 

    Of the three recipes, I chose the watercress / spinach soufflé, a little afraid to invest in the ingredients for the crab and artichoke soufflé or the chocolate soufflé.

    A great thing about the challenge is that you're not required to buy new dishes, pans, etc. An alternative is always given. In this case, I could use any 2-quart baking dish that had tall, relatively straight sides. But I thought this would be a great time to purchase a soufflé dish since one was not in my limited kitchen arsenal. 

    First stop was Wal-mart where a round soufflé dish costs around $22. No way! But, ah, an oval soufflé dish goes for $9. Go figure. So I purchased the oval dish, feeling proud that I had beaten the system. Imagine my disappointment when I began to re-read the recipe and discovered that the 2 1/2 quart oval dish was too large. Back to Wal-mart, return the oval soufflé dish, go to Target, prices and options the same, on to Tuesday Morning, T J Maxx, and a few other stores. No luck.

    The idea of emailing my neighbors came next. Most replies were simply "No," except for my exceptionally comical neighbor who responded, "Do I look like the kind of girl who would own a soufflé dish"? I'm still chuckling about that.

    Alan suggested going to Old Time Pottery, which I thought was a wasted trip, but you'll never guess what I found there: a round 2-quart soufflé dish for $2. Yes $2. So I bought two! Don't tell me you wouldn't have. You know you would. 

    My set-aside day for the challenge arrived and I have to admit I was nervous. I read and re-read the recipe upteen times and learned, among other things, that soufflé is French for puff up or blow up. I learned about making the roux, adding ingredients and whisking egg yolks over simmering water, preparing them, but not cooking them, for the cooked mixture. I was also told that perhaps the most difficult aspect of the challenge would be to photograph the finished soufflé since what goes up must come down. I was warned to work quickly.

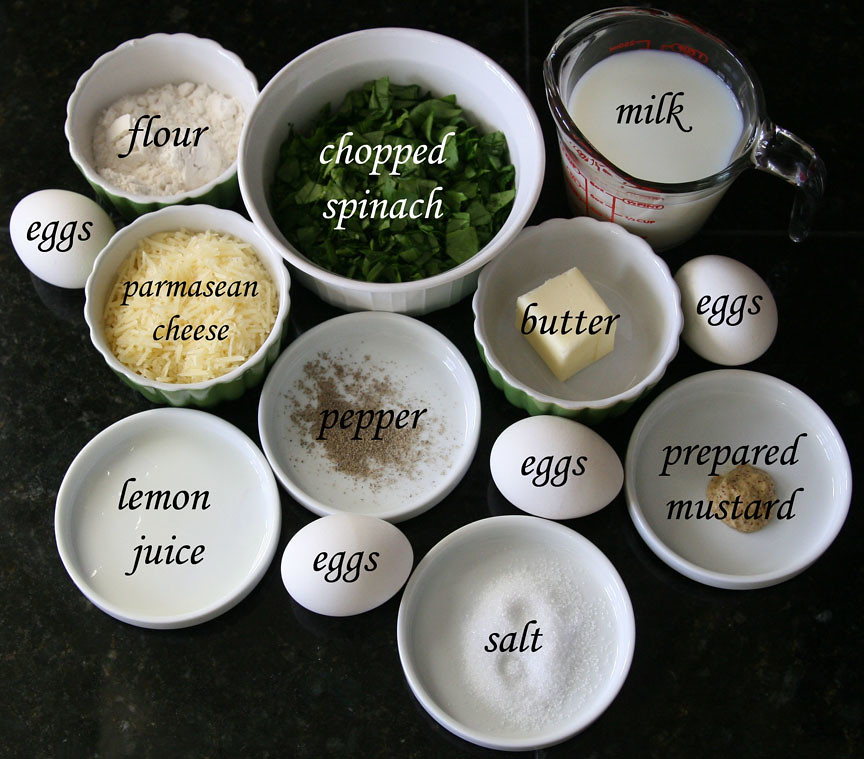
    The instructions also suggested that I prepare all ingredients prior to starting the cooking process. 

    Here's how my work area looked:


    2 tablespoons butter, plus additional for the soufflé dish
    3 1/2 tablespoons all purpose flour
    1 cup milk
    1/2 cup parmesan cheese, finely grated, plus additional for the soufflé dish
    1 cup finely chopped de-stemmed watercress (can substitute spinach) - this measure is the leaves after they’ve been washed, de-stemmed, and chopped
    4 large eggs, separated
    1/2 teaspoon prepared mustard
    1/4 teaspoon cream of tartar (a dash {~ 1/2 teaspoon} of lemon juice can be substituted)
    Salt and pepper to taste

    Directions:

    Butter the soufflé dish thoroughly, then grate a small amount of cheese in each dish and tap so that the sides are evenly coated with the cheese. Place the dish in the refrigerator until needed. This helps the soufflé climb.

    Preheat oven to 350º F.

    Wash and chop the watercress / spinach.

    Finely grate the parmesan cheese.

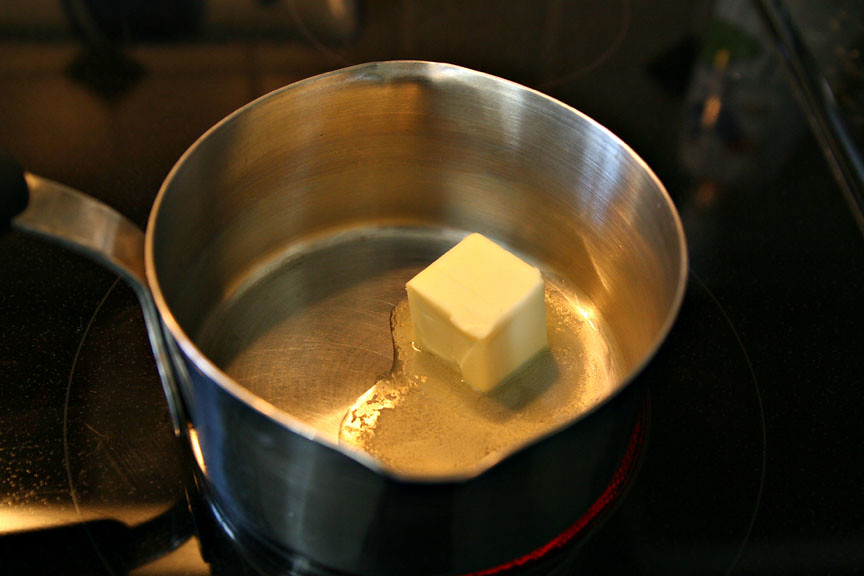
    In a medium-size saucepan, melt the butter over medium heat.


    Stir in the flour to make a roux. Cook 1 minute, then add the milk, a little at a time, and stir until just thickened, about 1 minute. Add the cheese and stir until it’s just melted. Remove from heat then add the watercress / spinach and salt and pepper.


    In a larger pan, bring water to a gentle simmer. (I used a double-boiler with a small amount of water in the bottom pot. I did not allow the water to touch the upper pot.) Whisk the egg yolks in a bowl set just over this water until pale and slightly foamy – about six minutes. Do not allow the eggs to cook.


    Mix the egg yolks into the watercress sauce.

    Beat the egg whites and cream of tartar until they form stiff peaks yet are still glossy.

    Fold the egg whites into the sauce in three additions so that it’s evenly mixed, but too much volume isn't lost.

    Remove the soufflé dish from the refrigerator and spoon the mix into it. Use a spatula to even the top and wipe off any spills.


    Bake 40 minutes, then serve immediately.


    At the end of 40 minutes, I was literally giddy with excitement. The soufflé had risen and looked and smelled divine.

    I shared some of the just-out-of-the-oven dish with a friend who commented that it was not only delicious but beautiful. That night, Alan said that every bite was fabulous and he was already looking forward to leftovers the following night.

    I will definitely make soufflés in the future, a lot less nervous and a lot more daring!

    Wednesday, November 10, 2010

    How I became involved in an Alabama holocaust survivors' exhibit

    In my recent post, "You didn't know Jack," I noted I would share how I became involved in "Darkness into Life: Alabama's Holocaust Survivors Through Photography and Art."

    In early 2005, my husband, Alan, and I were looking for a community project that would share our common interests. Alan is Jewish, I am Christian, and before we were married, we committed to being supportive of each other’s religion. But since we don’t worship together, we felt a desire to do something as a couple that would allow us to share a mutually-rewarding experience outside traditional spiritual settings.

    I had recently re-discovered photography, so right away we had our method, but we talked for months about the message. We discussed current issues: breast cancer, AIDS, homelessness, and organ donation since Alan’s son had recently undergone a successful liver transplant.

    But when we attended a local Holocaust Memorial Service and heard the first-hand accounts of the Holocaust, our message became clear. I had never met a Holocaust survivor, and had certainly never heard a first-hand account of that horrible time in history. I realized our grandchildren would be unlikely to hear these personal stories since many survivors are now in their 80’s and 90’s. As we walked to the car in stunned silence, I looked at Alan and said, “I think we found our project.”

    Additional weeks of discussion followed. Alan felt that we had to do something different from other Holocaust exhibits. We talked about the photographs we would shoot, how many (perhaps ten), and where we would exhibit, but we knew there was something missing in our plan.

    During this time, we attended an art exhibit by Mitzi J. Levin, and discovered the missing piece. We invited Mitzi to join us and paint the memories of the survivors: their childhood, imprisonment or hiding, and liberation. My photographs would capture them in the present and the result would be the stories of the lives of Birmingham’s Holocaust survivors – how they prevented Hitler from winning by living happy, successful lives, how they traveled from "Darkness into Life."

    Our initial exhibit at Birmingham’s Levite Jewish Community Center on April 1, 2007, drew 1,700 people on opening day. Staff members from the Birmingham Civil Rights Institute visited the exhibit and invited us to show at the Institute. They also asked us to expand the exhibit to include all of Alabama.

    Birmingham's Holocaust Survivors: (l-r) Ruth Siegler, Max Steinmetz,
    Ilse Nathan, Jack Bass (deceased), Henry Aizenman (deceased), Aisic Hirsch,
    Martin Aaron, Riva Hirsch, and Max Steinmetz
    The idea of ten photographs grew into a 78-piece exhibit that has been donated to the Birmingham Holocaust Education Committee to help teach junior and senior high school students about the Holocaust, genocide, and bigotry. And most importantly, to join together and say “Never Again!"

    Survivor Martin Aaron (back, middle) and Mortimer Jordan high school students
    I am proud to be part of this project and to have been entrusted with the inspiring stories of 20 people who became my friends and mentors. I am so thankful for knowing them and deeply miss the three survivors who are no longer with us.

    "Darkness into Life" currently travels to high schools, colleges, and community centers in Alabama and is booked almost two years in advance. For more information, contact Barbara Solomon.

    Over the next few months, I'll continue to share Alabama's holocaust survivors stories of survival and determination.

    Tuesday, November 9, 2010

    Lighter sweet country cornbread

    This isn't your mother's cornbread. And it isn't my mother's cornbread. But it is, by far, the best cornbread I have ever had.

    This recipe is from The Dash Diet for Hypertension by Thomas Moore, M.D.  Dash is an acronym for dietary approaches to stop hypertension and is an eating plan my doctor recommended to help manage my on-going battle with high blood pressure. (Thank you, Daddy, for the gift of hypertension.)

    Here's what you'll need to make this delicious Southern comfort food:


    1 cup skim milk
    2 tablespoons margarine, melted
    2 egg whites
    1 1/4 cups yellow cornmeal
    1 cup all-purpose flour
    1/2 cup granulated sugar (I use Splenda)
    1 tablespoon low-sodium baking powder

    Preheat the oven to 400 degrees F. Grease the bottom and sides of an iron skillet, muffin tins, or an 8 x 8-inch pan with cooking spray.

    In a large stainless steel mixing bowl, beat the milk, margarine, and egg whites together. Add the cornmeal, flour, sugar, and baking powder all at once and stir just until moistened. The batter will be lumpy.


    Pour the batter into the skillet, tins, or pan and bake for 20 to 25 minutes or until golden brown and toothpick inserted in the center comes out dry.


    Enjoy!

    12 servings - 144 calories, 2 fat grams, 45 mg. sodium per serving

    Thursday, November 4, 2010

    You didn't know Jack

    I loved Jack Bass. He's gone now. But I still love him.

    I didn't want to. Love him, that is. But I fell, just like anyone who met him, heard him speak, and became captivated by his intelligence, wit, and charm.

    I didn't want to love him because of his advanced age and poor health. I knew he was somewhat living on borrowed time and I never was very good with that whole better to have loved and lost thing. He had a severe heart condition that had almost claimed him some years back. I knew it would come knocking for him again soon.

    Love him? No way. He was often rude and frequently crude. He could tell an off-color joke almost better than Robin Williams and Lewis Black. But I could never help laughing. He was always on, always happy. If you spent 15 minutes with Jack, you’d be entertained by Truman Capote, Winston Churchill, and Ronald Reagan. “I inherited my sense of humor from my grandfather," he told me. "Of course, it disappeared when I was at Auschwitz. I became numb there….no anger, no pain, no feeling at all. It was difficult to focus on anything. I was just trying to live another hour.”
    Jack as Truman Capote
    But most of all, I didn't want to love him and have his pain become my pain. Knowing that someone I loved had suffered the atrocities of the Holocaust kept me awake at night. It still does.

    Jack Bass was born Jurgen Jakob Bassfreund in 1923 in Berncastle, Germany, ten years before the monster Adolph Hitler came to power. He was eight years old when he began to suffer name-calling by his classmates and was required by his teacher to recite a demeaning passage from the poem The Tree Which Wanted to Change Its Leaves by Friedrich Ruchert. Each time the poem was read, Jack was called forward to tell the story of a bearded Jew who stole the golden leaves from a beautiful tree in the forest. He never forgot the feelings that came with those recitations. When I first met him, he could still recite that poem from memory, his German accent heavy, his ocean-blue eyes watery and morose.

    Following his father’s death in 1932, Jack, his sister, and his mother moved to Trier, then Cologne, and finally to Berlin, each time moving to a larger city in an effort to remain anonymous. Jack’s mother remarried and recognizing the bleak future, his step-father left for the U.S. in 1938 to arrange the family’s emigration. During Kristallnacht in Berlin, Jack was almost killed in the glass-covered streets. His step-father did not return to Germany.

    In mid-1942, Joseph Goebbels, Reich Minister of Enlightenment and Propaganda, promised to make Berlin “Judenrein” (free of Jews) by Hitler’s birthday. Jack and his mother were arrested that year and separated during deportation. He was sent by railroad cattle car to Auschwitz; she was sent to her death.

    Because he was young and strong, Jack was selected for slave labor in five different camps: Auschwitz III (Buna or Monowitz), Auschwitz I, Dachau, Gross-Rosen, and Mühldorf. Each move was hastened by the approaching Russian forces. Jack worked building factories and sorting human hair to be used in the manufacture of mattresses.

    Jack's stories were so difficult to hear, especially this story I put together five years ago about 'running to the fence.'

      “Stop! High Voltage!” 
      Unfortunately, this warning was not enough to prevent prisoners from committing suicide on the electric fence surrounding the concentration camp. Jack Bass recalled that the thought of suicide was entertained by almost everyone, if only for a brief time. It was born from the helplessness of the harsh environment, the hunger, the disease, the fear of the unknown. 
      “Many people ended it all because the suffering was too great,” he said. “They chose what we called ‘running to the fence.’ They would fling themselves on the fence and die immediately as the electricity ran through their bodies. They would hang there until the current was turned off the next day. In yet one more act of cruelty by the Nazis, their bodies would remain on the ground for days. 
      “After a while, I became numb to that painful sight of death, at least during the day. But during my nightly walk to the outhouse, I had to turn away. The nights were always cold and foggy. The gloom that settled over me was intensified by a lifeless form stuck to the electric fence.”
    "Haunting Memories"
    One thing that helped Jack survive the camps was his love of music and the songs he silently hummed to himself everyday. I called him 'The Music Maven.' If you visited him at home, you would think you'd just entered a music library. Classical music was always playing softly in the background; ivory busts of Beethoven, Liszt, Chopin, and Paderevski sat quietly on the bookcase; and almost 1,000 pieces of music filled every nook and cranny.

    The Germans also recognized the power of music. At each of the extermination camps, the Nazis created orchestras of prisoner-musicians. Auschwitz, for example, had six orchestras, one of which contained more than 100 musicians. “The musician’s job was to motivate fellow prisoners by playing as they marched to and from work each day,” Jack told me. “I remember hearing The Merry Widow as I marched to my job of building an airport.” Sadly, many musicians were also forced to play and watch helplessly as their friends and families were led to the gas chambers. It’s no surprise that the suicide rate among musicians was higher than that of most other camp workers.

    Jack was near death on May 8, 1945, when the American GI’s took over the Mühldorf camp in Germany and sent him to a makeshift hospital in Ampfing, Germany.

    “I waited to be taken to the large Red Cross van, but noticed through the window that the van was too full to carry all of us, and I watched it pull away," he shared with me. "After all I had been through, I was left behind. Thankfully, the van returned for me the next day and took me from that horrible place to my freedom. I was twenty-two years old and weighed only sixty pounds."

    Always the comedian, Jack even managed to turn that horrid description of himself into humor. Years later, one of his favorite quips was directed to doubters of the Holocaust: “If the Holocaust didn’t happen, I went through one hell of a weight loss program for nothing."

    Probably by now, you're wondering, "After all that happened, how did Jack manage to be so happy, telling jokes and impersonations at every opportunity?" I wondered that, too, so one day I posed that question to him.

    "If I wasn't happy," he said with a twinkle in his eye, "Hitler would have won. And I'm not going to let that happen.

    Jack died this year. I visited him in the hospital intensive care unit, a room so full of machines and tubes, I almost had to play hopscotch to get to his bedside. When I gently touched 706332 tattooed on arm, he opened his eyes, and with his face and hands barely moving, he began to impersonate Truman Capote. He was making me laugh even as he was dying.

    I loved Jack Bass. He's gone now. But I still love him.

    (I met Jack through my involvement in "Darkness into Life: Alabama's Holocaust Survivors through Photography and Art." I'll share the history of the exhibit with you next week.)

    Monday, November 1, 2010

    Honey mustard vinaigrette

    I ran across the most amazing honey mustard vinaigrette recipe last Friday. I'd been looking for a honey mustard salad dressing recipe for a few weeks, and this one far exceeded anything I'd hoped to make. Not only is it delicious with a savory fragrance, it is unbelievably quick and easy to make.

    Here's what you'll need:


    1/2 cup olive oil
    1/4 cup white wine vinegar
    1 clove of garlic (pressed)
    1 tablespoon dijon mustard
    2 tablespoons honey
    salt and pepper to taste

    I mixed all ingredients in my gently-used-recently-purchased-at-a-bargain KitchenAid mixer because I love it dearly and look for any excuse to use it. I have even discovered I can generate enough air with the wisk attachment to dry my hair!

    Or you can simply mix all ingredients together and shake well.


    Add more honey for a sweeter vinaigrette or more mustard for a tangier vinaigrette.

    Saturday night, we enjoyed our new find on a tossed salad with tomato, cheese, cucumber, zuchinni, and toasted almonds. Sunday night, we equally loved it with spinach, grapes, feta, and pecans.

    Almost forgot! Just kidding about the hair drying comment!

    Kinda!