Ok, so one bright, sunny day last December, DH and I were out Christhanukah shopping and popped into HomeGoods to look for a special-request gift for DD1. After a little shopping, I made my way over to join Alan, who was (yikes) holding a cheesecake pan.
With that cute, crooked smile he has, he looked at me and said in husband-speak, "Hey, Honey. I kinda thought you might want to get this just in case one day you might perhaps want to make a cheesecake maybe." Translation: "I'm going to get this pan so that you can learn to make my mother's extraordinary, stupendous, incredible, phenomenal cheesecake."
Alan proceeded to the long-line check-out; I (demurely) fainted.
Some minutes later, after the paramedics arrived and the smelling salts kicked in, I explained to them about my husband, the pan, and the impossible task of re-creating my mother-in-law's extraordinary, stupendous, incredible, phenomenal cheesecake. A few dozen sympathetic shoppers looked on as one of the paramedics shook his head and said, "Even I know better than to ask my wife to do something like my mother does." I let him know that his wife was one lucky woman, and I swear that had nothing to do with how much he looked like DiNozzo.
After the holidays passed, and life settled back into our routine, good fortune seemed to be on my side. For a few months, I was successful in skating the cheesecake issue. Alan can sometimes be prone to forget (wink, wink), and I was heavily praying this would be one of those times. I hid the much-maligned pan in the very back of the lower cabinet, and as April showers turned into May flowers, I was breathing thankful, but silent, sighs of relief.
Then, one day as I was ditching the ubiquitous Slice-O-Matic Onion Chopper (as seen on TV), I caught a glimpse of the Teflon rim of the cloistered spring-pan. I suddenly remembered how I had successfully met Alan's request for chopped liver ("like my mother's"). He raved about my creation, and even went so far as to roll his eyes heavenward and tell me it was even better than hers. At that point, I realized I wasn't .....well.....exactly chopped liver as they say, so why not give the cheesecake a try?
My mother-in-law happily passed along the recipe and I headed to the grocery. I washed and dried the dusty pan, walked in circles around my kitchen island for half an hour, and then began to nervously place the cream cheese and other ingredients in the mixer.
"Hey," I began to think as I scrapped the sides of the bowl. "This really is pretty easy." And I was oh, so, so happy to find that the ten minutes I spent trying to put the *&%# spring-pan back together really didn't hurt the consistency of the batter one little bit.
Just south of an hour later, I was doing the Snoopy Dance and loudly singing, "I made Nana's cheesecake" to the tune of "Mary Had a Little Lamb." It was a Kodak moment that I, and my dogs, will never forget.
That night, Alan ooh'ed and aah'ed as he scraped the dessert plate.
"Honey, you nailed it." (That's husband-speak for, "Darlin', I am so glad I married you!")
Now, it's your turn to make Nana Ruby's extraordinary, stupendous, incredible, phenomenal cheesecake. Get busy practicing your very own song and dance, and slide on over to preheat your oven to 350 degrees.
Here's what you'll need:
Crust
1 1/2 cups graham cracker crumbs
1/4 cup butter, melted
Cheesecake
3 large packages cream cheese - room temperature
4 eggs
1 1/4 cups sugar
1 teaspoon vanilla
Topping
1 pint sour cream
1/4 cup sugar
1 teaspoon vanilla
Mix together graham cracker crumbs and melted butter.
Press mixture into bottom of spring-pan. Set aside.
In mixer (or by hand), mix cream cheese until blended. Add eggs, one at a time, mixing well after each egg is added.
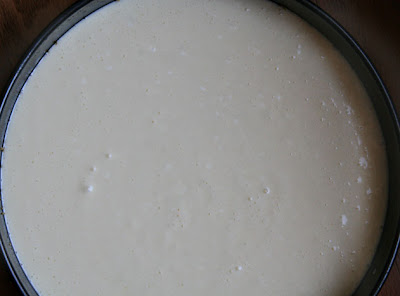
Add sugar and vanilla. Continue mixing until creamy. Pour onto crust.
Bake at 350 degrees for 30 minutes.
Mix topping ingredients (sour cream, sugar, and vanilla) gently by hand.
Spread topping onto cheesecake.
Return cake to oven and bake 15 minutes at 350 degrees.
Viola!
Allow to cool at least one hour. I've never been able to resist a piece at this point, but the flavor is really enhanced when the cheesecake is served after being refrigerated overnight. Good luck with that.
Maybe next I'll conquer Nana Ruby's gefilte fish.
Nahhhh.
Showing posts with label Recipes. Show all posts
Showing posts with label Recipes. Show all posts
Wednesday, September 14, 2011
Saturday, December 11, 2010
Homemade almond butter
In my slow, but steady, journey to a more natural diet, I began making almond butter a few months ago.
I was often reading of the benefits of this wonderful alternative to peanut butter. The Doctors, Jillian Michaels, and Denise Austin said I should switch from peanut butter to almond butter so I jumped in the car and headed to the grocery store. When I saw the price, I immediately had a heart attack and fell to the floor faster than Alan can fall asleep in the recliner. When the paramedics came, they recommended that I learn to make my own almond butter. After all, what good are the health benefits if I have a coronary every time I purchase a jar? Made perfect sense to me.
Before I share my recipe, here's what I have learned about almond butter:
It is a food paste made from almonds (duh). Almonds are high in monounsaturated fats, which are considered to be a healthier form of fat than saturated fat. Like other nut butters, almond butter retains the nutritional value of the almonds it comes from. It is rich in protein, calcium, iron, essential fatty acids, Vitamin E, magnesium, and it is a great source of fiber. Unfortunately, it is also higher in calories than many other nut butters, but to me, the heart-health benefits outweigh the extra calories.
The uses for almond butter are as varied as they are for peanut butter. It can be used like a spread, mixed into sauces and dressings, eaten plain, or used in desserts. The flavor is actually quite similar to peanut butter, with a faint hint of almonds.
There are a number of different styles of almond butter, starting with toasted or raw. Toasted almond butter has a richer flavor, but some people prefer the milder taste of raw almond butter. The smoothest and creamiest is made from almonds that have been blanched to remove their skins, and then finely ground. More chunky versions include almond skin, and are not ground as finely.
My version is made with toasted almonds, including the skin. I have made both toasted and raw, and personally prefer toasted.
You'll need a heavy-duty food processor (not the small, mini version) plus these ingredients:
2 cups toasted almonds (I toast in the toaster oven on 350 degrees for six minutes)
1/2 teaspoon salt (or to taste)
2 tablespoons olive oil (or to taste)
2 tablespoons brown sugar (or to taste)
Add the toasted almonds to the food processor and process until the nuts are finely chopped and begin to turn creamy (1-2 minutes). Add the salt, olive oil, and brown sugar and process until the following consistency:
That's it! Seriously!
Store the almond butter in your pantry or refrigerator. Just remember, there are no preservatives, so choose your storage method with that in mind. I have successfully pantry-stored almond butter for over a week with no problem.
Enjoy!
I was often reading of the benefits of this wonderful alternative to peanut butter. The Doctors, Jillian Michaels, and Denise Austin said I should switch from peanut butter to almond butter so I jumped in the car and headed to the grocery store. When I saw the price, I immediately had a heart attack and fell to the floor faster than Alan can fall asleep in the recliner. When the paramedics came, they recommended that I learn to make my own almond butter. After all, what good are the health benefits if I have a coronary every time I purchase a jar? Made perfect sense to me.
Before I share my recipe, here's what I have learned about almond butter:
It is a food paste made from almonds (duh). Almonds are high in monounsaturated fats, which are considered to be a healthier form of fat than saturated fat. Like other nut butters, almond butter retains the nutritional value of the almonds it comes from. It is rich in protein, calcium, iron, essential fatty acids, Vitamin E, magnesium, and it is a great source of fiber. Unfortunately, it is also higher in calories than many other nut butters, but to me, the heart-health benefits outweigh the extra calories.
The uses for almond butter are as varied as they are for peanut butter. It can be used like a spread, mixed into sauces and dressings, eaten plain, or used in desserts. The flavor is actually quite similar to peanut butter, with a faint hint of almonds.
There are a number of different styles of almond butter, starting with toasted or raw. Toasted almond butter has a richer flavor, but some people prefer the milder taste of raw almond butter. The smoothest and creamiest is made from almonds that have been blanched to remove their skins, and then finely ground. More chunky versions include almond skin, and are not ground as finely.
My version is made with toasted almonds, including the skin. I have made both toasted and raw, and personally prefer toasted.
You'll need a heavy-duty food processor (not the small, mini version) plus these ingredients:
2 cups toasted almonds (I toast in the toaster oven on 350 degrees for six minutes)
1/2 teaspoon salt (or to taste)
2 tablespoons olive oil (or to taste)
2 tablespoons brown sugar (or to taste)
Add the toasted almonds to the food processor and process until the nuts are finely chopped and begin to turn creamy (1-2 minutes). Add the salt, olive oil, and brown sugar and process until the following consistency:
That's it! Seriously!
Store the almond butter in your pantry or refrigerator. Just remember, there are no preservatives, so choose your storage method with that in mind. I have successfully pantry-stored almond butter for over a week with no problem.
 |
| I love almond butter on vanilla wafers! What's not to love? |
Monday, November 15, 2010
My first Daring Cooks' Challenge: spinach soufflé
A few months ago, a friend of Alan's suggested I join The Daring Kitchen, an-online community of cooks and bakers who are challenged each month to cook or bake something new and different. Everyone uses the same recipe and then posts their results, with narrative and photographs, on their blog. Sounded like fun to me, so here I am...posting the results of my first challenge: a spinach soufflé.
Dave and Linda from Monkeyshines in the Kitchen chose soufflés as our November 2010 Daring Cooks' Challenge! Dave and Linda provided two of their own delicious recipes plus a sinfully decadent chocolate soufflé recipe adapted from Gordon Ramsay's recipe found at the BBD Good Food website.
Of the three recipes, I chose the watercress / spinach soufflé, a little afraid to invest in the ingredients for the crab and artichoke soufflé or the chocolate soufflé.
A great thing about the challenge is that you're not required to buy new dishes, pans, etc. An alternative is always given. In this case, I could use any 2-quart baking dish that had tall, relatively straight sides. But I thought this would be a great time to purchase a soufflé dish since one was not in my limited kitchen arsenal.
First stop was Wal-mart where a round soufflé dish costs around $22. No way! But, ah, an oval soufflé dish goes for $9. Go figure. So I purchased the oval dish, feeling proud that I had beaten the system. Imagine my disappointment when I began to re-read the recipe and discovered that the 2 1/2 quart oval dish was too large. Back to Wal-mart, return the oval soufflé dish, go to Target, prices and options the same, on to Tuesday Morning, T J Maxx, and a few other stores. No luck.
The idea of emailing my neighbors came next. Most replies were simply "No," except for my exceptionally comical neighbor who responded, "Do I look like the kind of girl who would own a soufflé dish"? I'm still chuckling about that.
Alan suggested going to Old Time Pottery, which I thought was a wasted trip, but you'll never guess what I found there: a round 2-quart soufflé dish for $2. Yes $2. So I bought two! Don't tell me you wouldn't have. You know you would.
My set-aside day for the challenge arrived and I have to admit I was nervous. I read and re-read the recipe upteen times and learned, among other things, that soufflé is French for puff up or blow up. I learned about making the roux, adding ingredients and whisking egg yolks over simmering water, preparing them, but not cooking them, for the cooked mixture. I was also told that perhaps the most difficult aspect of the challenge would be to photograph the finished soufflé since what goes up must come down. I was warned to work quickly.
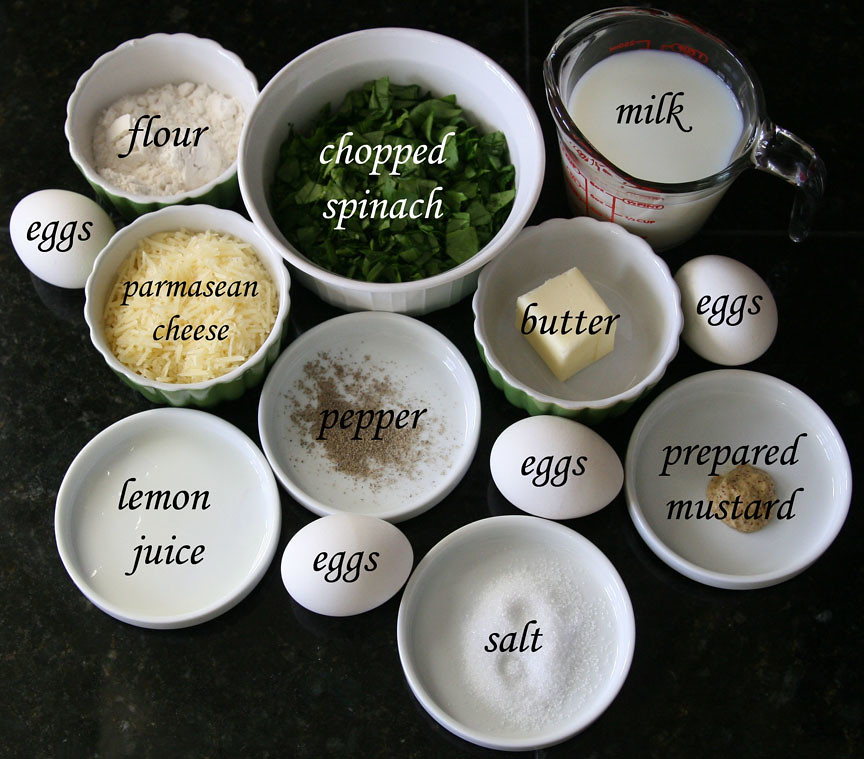
The instructions also suggested that I prepare all ingredients prior to starting the cooking process.
Here's how my work area looked:
2 tablespoons butter, plus additional for the soufflé dish
3 1/2 tablespoons all purpose flour
1 cup milk
1/2 cup parmesan cheese, finely grated, plus additional for the soufflé dish
1 cup finely chopped de-stemmed watercress (can substitute spinach) - this measure is the leaves after they’ve been washed, de-stemmed, and chopped
4 large eggs, separated
1/2 teaspoon prepared mustard
1/4 teaspoon cream of tartar (a dash {~ 1/2 teaspoon} of lemon juice can be substituted)
Salt and pepper to taste
Directions:
Butter the soufflé dish thoroughly, then grate a small amount of cheese in each dish and tap so that the sides are evenly coated with the cheese. Place the dish in the refrigerator until needed. This helps the soufflé climb.
Preheat oven to 350º F.
Wash and chop the watercress / spinach.
Finely grate the parmesan cheese.
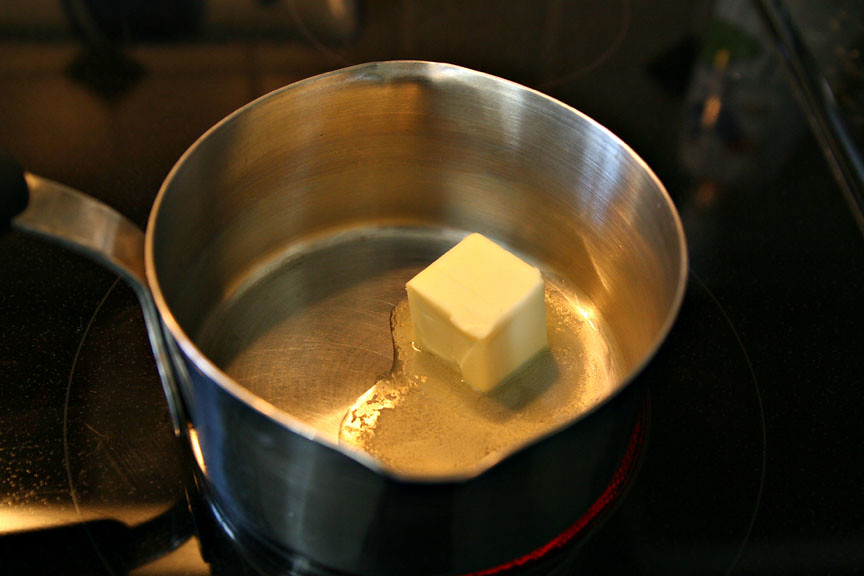
In a medium-size saucepan, melt the butter over medium heat.
Stir in the flour to make a roux. Cook 1 minute, then add the milk, a little at a time, and stir until just thickened, about 1 minute. Add the cheese and stir until it’s just melted. Remove from heat then add the watercress / spinach and salt and pepper.
In a larger pan, bring water to a gentle simmer. (I used a double-boiler with a small amount of water in the bottom pot. I did not allow the water to touch the upper pot.) Whisk the egg yolks in a bowl set just over this water until pale and slightly foamy – about six minutes. Do not allow the eggs to cook.
Mix the egg yolks into the watercress sauce.
Beat the egg whites and cream of tartar until they form stiff peaks yet are still glossy.
Fold the egg whites into the sauce in three additions so that it’s evenly mixed, but too much volume isn't lost.
Remove the soufflé dish from the refrigerator and spoon the mix into it. Use a spatula to even the top and wipe off any spills.
Bake 40 minutes, then serve immediately.
At the end of 40 minutes, I was literally giddy with excitement. The soufflé had risen and looked and smelled divine.
I shared some of the just-out-of-the-oven dish with a friend who commented that it was not only delicious but beautiful. That night, Alan said that every bite was fabulous and he was already looking forward to leftovers the following night.
I will definitely make soufflés in the future, a lot less nervous and a lot more daring!
Tuesday, November 9, 2010
Lighter sweet country cornbread
This isn't your mother's cornbread. And it isn't my mother's cornbread. But it is, by far, the best cornbread I have ever had.
This recipe is from The Dash Diet for Hypertension by Thomas Moore, M.D. Dash is an acronym for dietary approaches to stop hypertension and is an eating plan my doctor recommended to help manage my on-going battle with high blood pressure. (Thank you, Daddy, for the gift of hypertension.)
Here's what you'll need to make this delicious Southern comfort food:
1 cup skim milk
2 tablespoons margarine, melted
2 egg whites
1 1/4 cups yellow cornmeal
1 cup all-purpose flour
1/2 cup granulated sugar (I use Splenda)
1 tablespoon low-sodium baking powder
Preheat the oven to 400 degrees F. Grease the bottom and sides of an iron skillet, muffin tins, or an 8 x 8-inch pan with cooking spray.
In a large stainless steel mixing bowl, beat the milk, margarine, and egg whites together. Add the cornmeal, flour, sugar, and baking powder all at once and stir just until moistened. The batter will be lumpy.
Pour the batter into the skillet, tins, or pan and bake for 20 to 25 minutes or until golden brown and toothpick inserted in the center comes out dry.
Enjoy!
12 servings - 144 calories, 2 fat grams, 45 mg. sodium per serving
Monday, November 1, 2010
Honey mustard vinaigrette
I ran across the most amazing honey mustard vinaigrette recipe last Friday. I'd been looking for a honey mustard salad dressing recipe for a few weeks, and this one far exceeded anything I'd hoped to make. Not only is it delicious with a savory fragrance, it is unbelievably quick and easy to make.
Here's what you'll need:
1/2 cup olive oil
1/4 cup white wine vinegar
1 clove of garlic (pressed)
1 tablespoon dijon mustard
2 tablespoons honey
salt and pepper to taste
I mixed all ingredients in my gently-used-recently-purchased-at-a-bargain KitchenAid mixer because I love it dearly and look for any excuse to use it. I have even discovered I can generate enough air with the wisk attachment to dry my hair!
Or you can simply mix all ingredients together and shake well.
Add more honey for a sweeter vinaigrette or more mustard for a tangier vinaigrette.
Saturday night, we enjoyed our new find on a tossed salad with tomato, cheese, cucumber, zuchinni, and toasted almonds. Sunday night, we equally loved it with spinach, grapes, feta, and pecans.
Almost forgot! Just kidding about the hair drying comment!
Kinda!
Wednesday, October 27, 2010
Two ingredient pumpkin muffins
You heard me correctly. Or would that be read me correctly? Either way.....
Two ingredient pumpkin muffins. Two, as in deux, dos, due, 二, twee, ni, dva, tsvey.
This is, without a doubt, the most simple recipe ever. It always turns out perfectly. Even if you can't boil water, it is impossible for these muffins to be a failure. Well, not impossible. If they're left in the oven a really, really long time, they will burn. But you get the picture.
Speaking of picture, here are those two ingredients.
In a large mixing bowl, combine the two ingredients. The batter will be thick and lumpy and have that wonderful, soothing smell of Fall. Plop into muffin tins or a loaf pan sprayed with non-stick spray. I bake them in muffin tins, bag individually, and store in the freezer for a quick out-the-door breakfast or yummy afternoon snack.
Of course, you could stop at two ingredients because they are, after all, two ingredient muffins. But you don't have to stop there. Add chopped apple, an overripe banana, raisins, or nuts. Or better yet, add them all!
Bake according to the instructions for the cake mix or until a toothpick inserted in the center of the muffin or loaf is clean. If you add the extra ingredients, cooking time will increase, usually by 5 - 10 minutes.
Remove to a cooling rack and allow to cool for 10 minutes, if possible! Serve with butter and honey.
Hey, I saw that! Didn't your mother tell you not to lick your fingers?
Two ingredient pumpkin muffins. Two, as in deux, dos, due, 二, twee, ni, dva, tsvey.
This is, without a doubt, the most simple recipe ever. It always turns out perfectly. Even if you can't boil water, it is impossible for these muffins to be a failure. Well, not impossible. If they're left in the oven a really, really long time, they will burn. But you get the picture.
Speaking of picture, here are those two ingredients.
 |
| Only two ingredients are used in delicious pumpkin muffins. |
Of course, you could stop at two ingredients because they are, after all, two ingredient muffins. But you don't have to stop there. Add chopped apple, an overripe banana, raisins, or nuts. Or better yet, add them all!
 |
| Don't try to make them pretty! |
 |
| Butter and honey, anyone? |
Hey, I saw that! Didn't your mother tell you not to lick your fingers?
Tuesday, October 12, 2010
Honey wheat bread (with update)
Nothing smells more heavenly and stirs more positive memories than a loaf of bread wafting from the oven. (It's not everyday that I get to use wafting in a sentence. That was pretty exciting!) The added bonus for me is that it's not filled with things I can't spell or pronounce. No hidden additives and no preservatives. Just healthy ingredients that, when mixed together and risen to perfection, feel like velvet as I turn it into the loaf pan.
I started making bread about 30 years ago. Since then, I have tried countless recipes and this is my favorite, and the favorite of my family. I generally can rack up about 10 bonus wife points with this recipe.
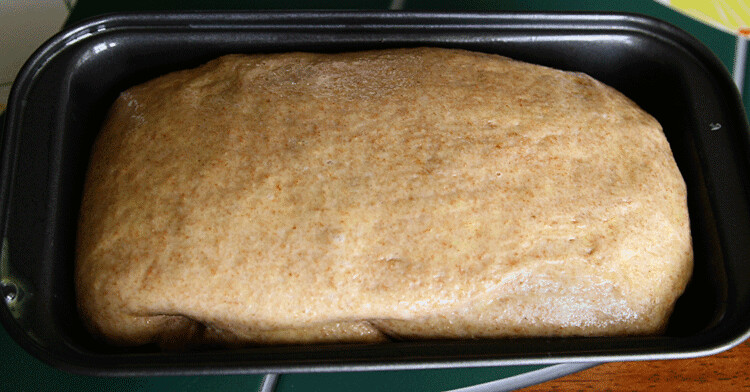
I'd like to say that I'm a purist and that I make this delicious bread the old-fashioned way. I'd like to say that, but I can't. I'm a little on what some might call the lazy side (I prefer to think I'm practicing time management), so I let my bread machine do most of the work. I use the "dough" setting for mixing, kneading, and the first rising. Then I transfer the dough to a loaf pan for the final rising and baking. It's a visual thing for me. I prefer my bread to look like a loaf and not a square box. And I despise the hole in the bottom of the bread that's left by the mixing / kneading blade.
Here's what you'll need:
Non-stick spray
1 1/8 cups warm milk (110 degrees F/45 degrees C)
1/4 cup honey
1 teaspoon salt
2 cups whole wheat flour, or 1 1/2 cups whole wheat flour*
1 cup bread flour, or 1 1/2 cups bread flour*
(*flour to total 3 cups)
2 tablespoons olive oil, or melted butter
1 1/2 teaspoons active dry yeast
1 egg (optional)
Spray the bread machine canister with non-stick spray. Add ingredients in the order recommended in your bread machine manual. Select the "dough" setting and then take a nap, read a book, or whatever. You'll have about 1 3/4 hours, give or take a few minutes.
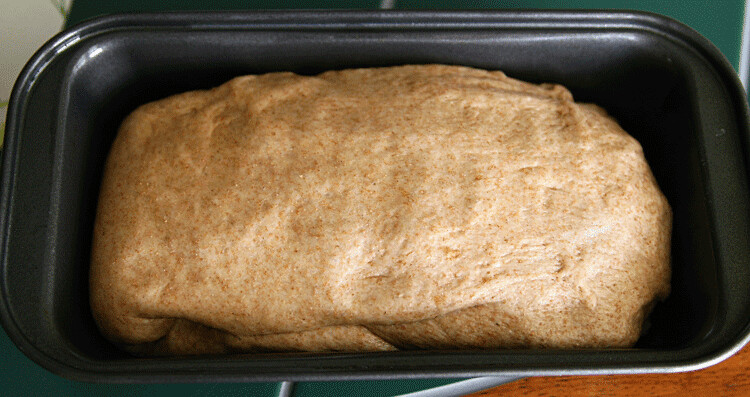
At the end of the "dough" setting, transfer the dough to a loaf pan sprayed with non-stick spray. Shape as needed and press lightly to remove air bubbles. I hate those pesky holes in the middle of sandwich bread.
Optional: gently use a pastry brush to glaze the top of the bread with a beaten egg.
Cover the pan with a clean cloth, place in a warm area, and allow to rise for 30 minutes.
Bake in a preheated 350 degree oven for 30 minutes.
Remove from pan and cool on a wire rack.
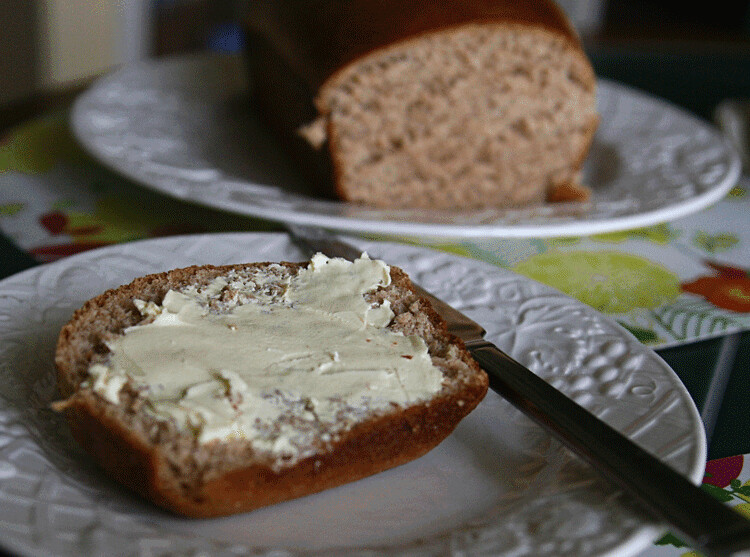
Slather with butter and enjoy!
Notes:
UPDATE 10/26/10
Several people have emailed me asking if this recipe can be increased to produce a larger loaf. The answer is absolutely! I love the larger loaf...it's so pretty, and I love the smaller loaf, too.....it's so pretty!
Here are the ingredient conversions:
1 3/4 cups warm milk (110 degrees F/45 degrees C)
1/3 cup honey
1 1/2 teaspoons salt
3 cups whole wheat flour, or 2 1/2 cups whole wheat flour*
1 1/2 cups bread flour, or 2 cups bread flour*
(*flour to total 4 1/2 cups)
3 tablespoons olive oil, or melted butter
2 1/4 teaspoons active dry yeast
Recipe directions remain the same.
I started making bread about 30 years ago. Since then, I have tried countless recipes and this is my favorite, and the favorite of my family. I generally can rack up about 10 bonus wife points with this recipe.
I'd like to say that I'm a purist and that I make this delicious bread the old-fashioned way. I'd like to say that, but I can't. I'm a little on what some might call the lazy side (I prefer to think I'm practicing time management), so I let my bread machine do most of the work. I use the "dough" setting for mixing, kneading, and the first rising. Then I transfer the dough to a loaf pan for the final rising and baking. It's a visual thing for me. I prefer my bread to look like a loaf and not a square box. And I despise the hole in the bottom of the bread that's left by the mixing / kneading blade.
Here's what you'll need:
Non-stick spray
1 1/8 cups warm milk (110 degrees F/45 degrees C)
1/4 cup honey
1 teaspoon salt
2 cups whole wheat flour, or 1 1/2 cups whole wheat flour*
1 cup bread flour, or 1 1/2 cups bread flour*
(*flour to total 3 cups)
2 tablespoons olive oil, or melted butter
1 1/2 teaspoons active dry yeast
1 egg (optional)
Spray the bread machine canister with non-stick spray. Add ingredients in the order recommended in your bread machine manual. Select the "dough" setting and then take a nap, read a book, or whatever. You'll have about 1 3/4 hours, give or take a few minutes.
At the end of the "dough" setting, transfer the dough to a loaf pan sprayed with non-stick spray. Shape as needed and press lightly to remove air bubbles. I hate those pesky holes in the middle of sandwich bread.
Optional: gently use a pastry brush to glaze the top of the bread with a beaten egg.
Cover the pan with a clean cloth, place in a warm area, and allow to rise for 30 minutes.
Bake in a preheated 350 degree oven for 30 minutes.
Remove from pan and cool on a wire rack.
Slather with butter and enjoy!
Notes:
- This recipe works even if you're not into time management like I am. You can omit the bread machine and make this recipe completely on your own, or use your bread machine for the entire process.
- Water can be used instead of milk. I like the milk's nutritional benefits and the beautiful texture and enhanced flavor it adds to the bread.
- If you don't have a food thermometer, about 50 seconds in the microwave will warm the milk to approximately 110 degrees.
- Apply non-stick spray to the measuring cup you'll use for the honey. The honey will slide out of the measuring cup with absolutely no help from you.
UPDATE 10/26/10
Several people have emailed me asking if this recipe can be increased to produce a larger loaf. The answer is absolutely! I love the larger loaf...it's so pretty, and I love the smaller loaf, too.....it's so pretty!
Here are the ingredient conversions:
1 3/4 cups warm milk (110 degrees F/45 degrees C)
1/3 cup honey
1 1/2 teaspoons salt
3 cups whole wheat flour, or 2 1/2 cups whole wheat flour*
1 1/2 cups bread flour, or 2 cups bread flour*
(*flour to total 4 1/2 cups)
3 tablespoons olive oil, or melted butter
2 1/4 teaspoons active dry yeast
Recipe directions remain the same.
Monday, September 20, 2010
Peach salsa for grilled fish
I'm not sure I'll ever look for another fish topping. This delicious peach salsa is also to-die-for on poultry and I usually make enough to top off chicken the following night.
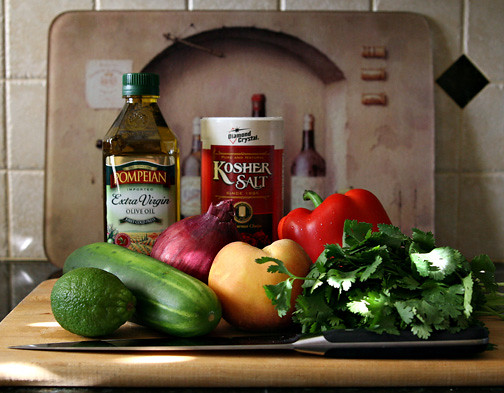
Here's the bill of groceries you'll need:
{Raise your hand if the phrase "bill of groceries" is familiar!
If your hand is still down, well then, it's obvious you've never lived in the country.
Today, I ask, "I'm going to run by the grocery store. Does anyone need anything?"
But as a little girl, growing up in Carbon Hill, I'd run next door to the tiny white-frame house that once belonged to my parents.
"Francis (yes, Williams), Mama's gonna do a bill of groceries today. Do you need anything?"}
But, back to our recipe. Measurements aren't used in this recipe, so you can easily determine the flavor by the quantity of each ingredient.
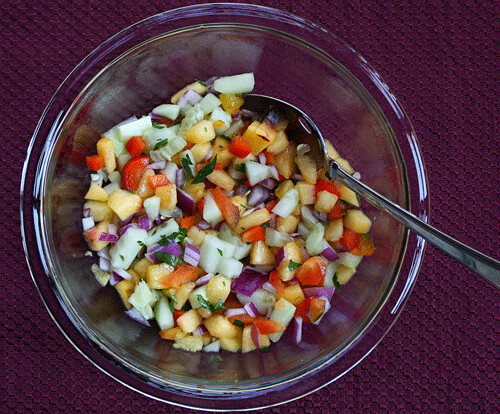
Dice and toss into a medium-size bowl: a peeled peach, cucumber, red bell pepper, and purple onion.
Add chopped cilantro, a squeeze of lime juice, olive oil, and salt.
Stir and refrigerate for at least an hour.
Viola! That all there is to it.
Enjoy.
P.S. Let me know if you've ever said "bill of groceries."
Subscribe to:
Posts (Atom)


